
Troubleshooting
You find yourself with one of these batteries and it just doesn't work? Let's go step by step. You will need a smartphone, a multimeter, and a paper notebook to take notes of the steps and measurements you take. The battery must be worked on with a feeling of great peace of mind. Batteries are dangerous. They must not be drilled, punctured, overcharged, otherwise abused. Problems can escalate very quickly. Good and safe working environment is very important.
Step 0: Visual inspection
Take off the seat and you should see something like this:
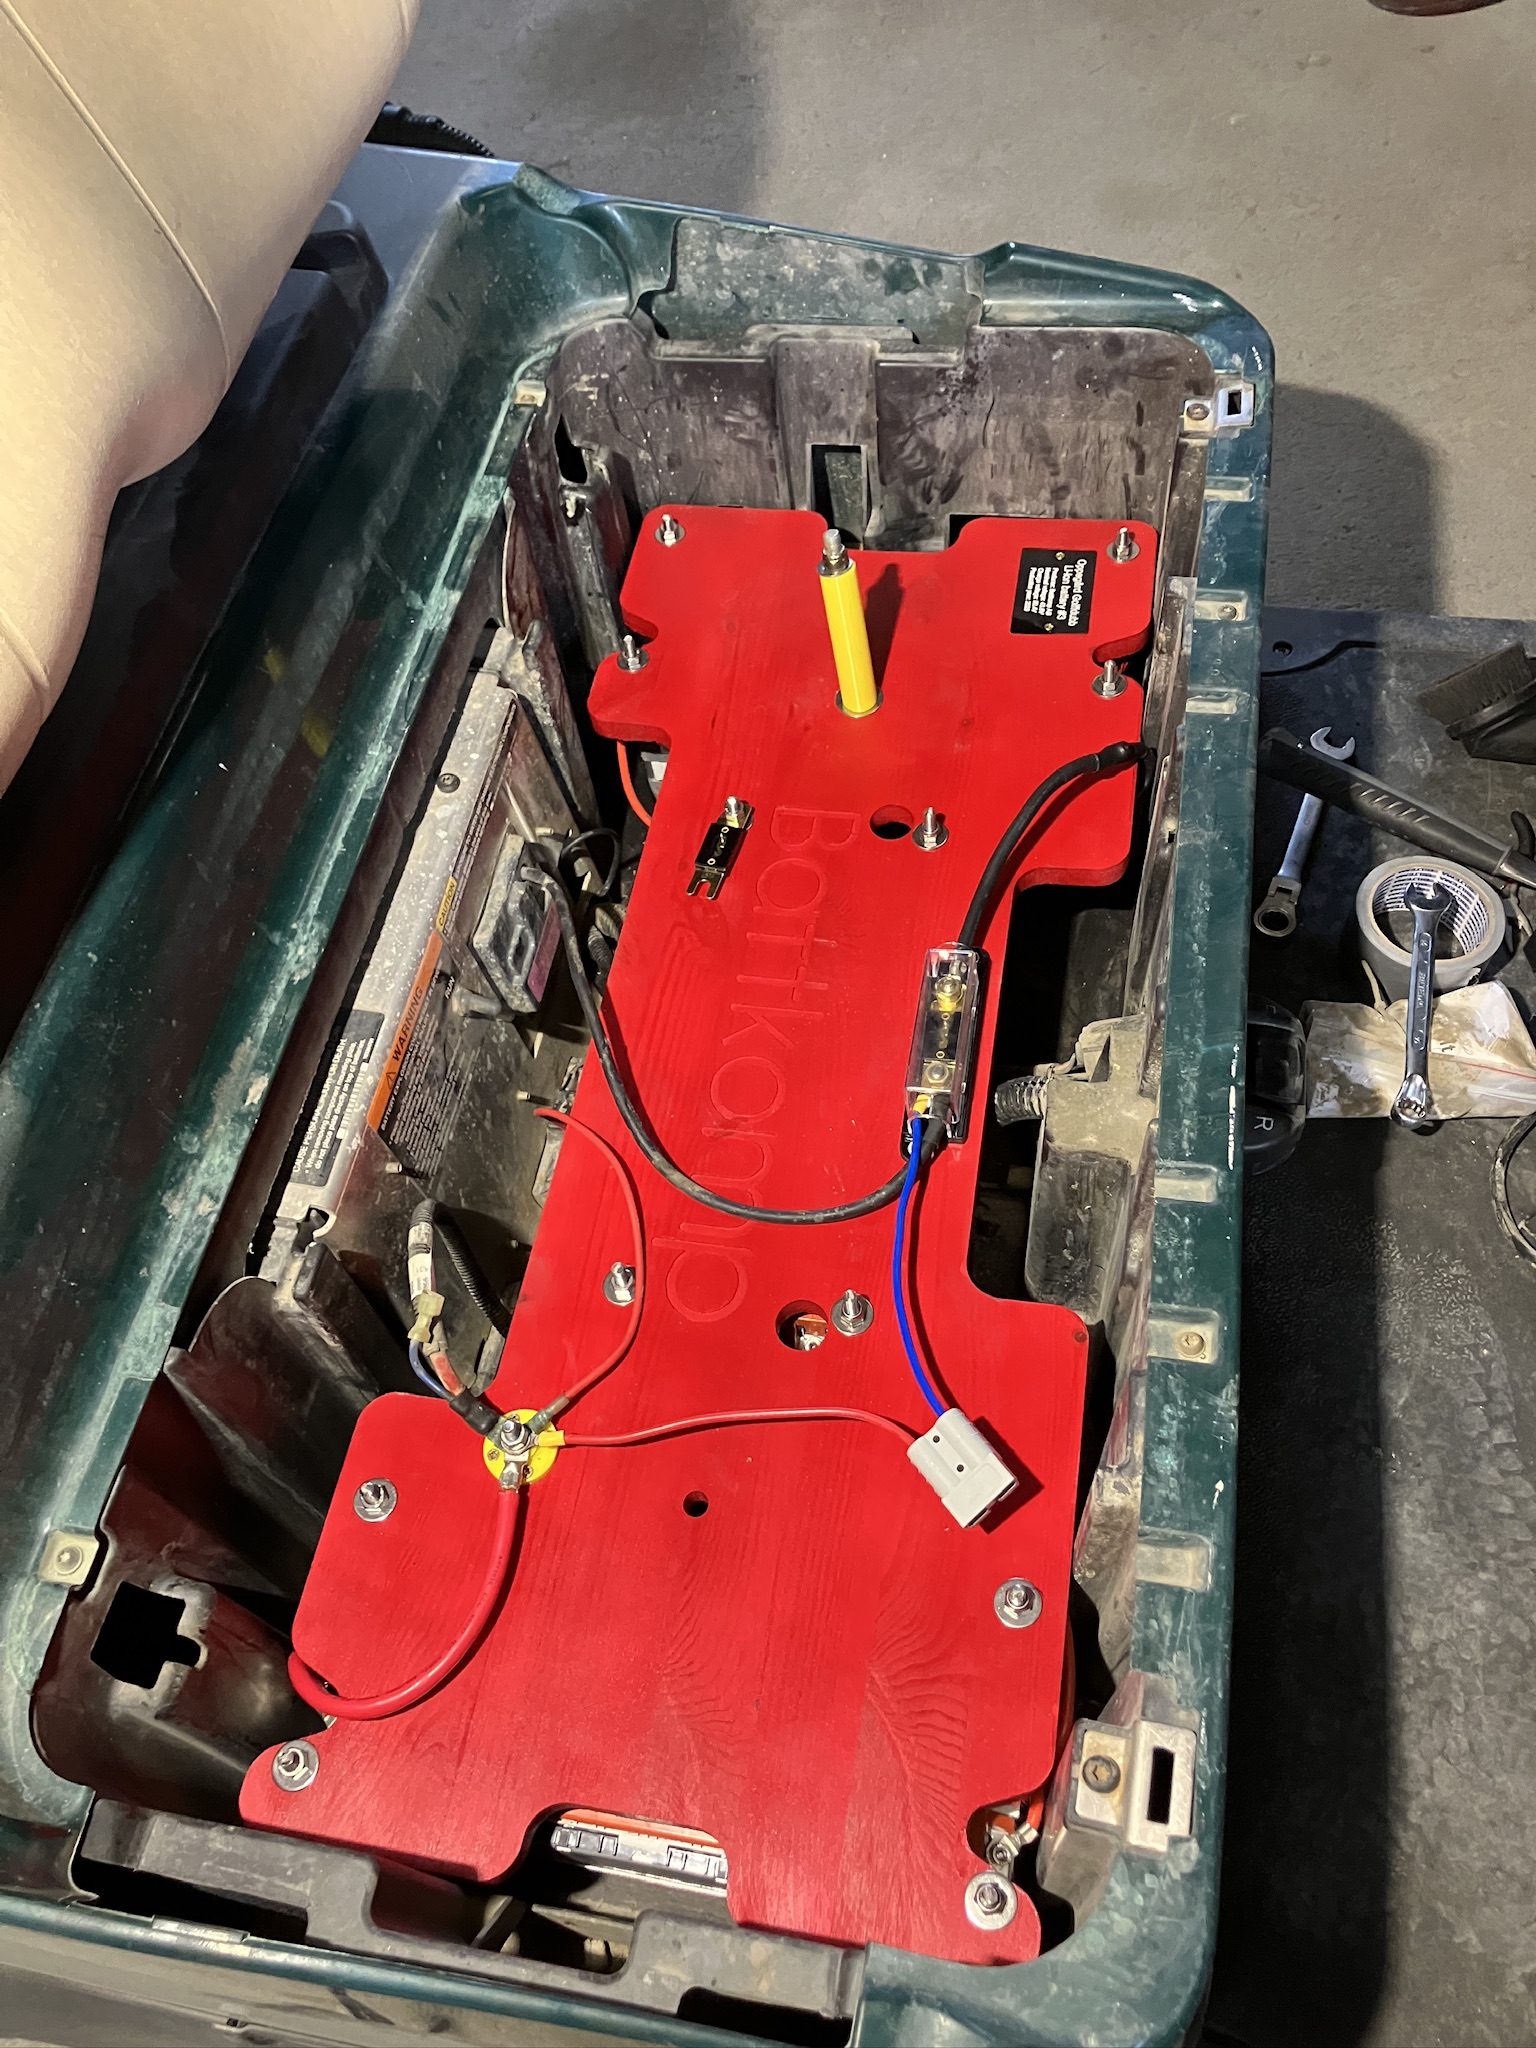
Make sure the fuse is good. There is no debris, burnt parts, loose things. Clean it if dirty.
Step 1: Verifying the modules.
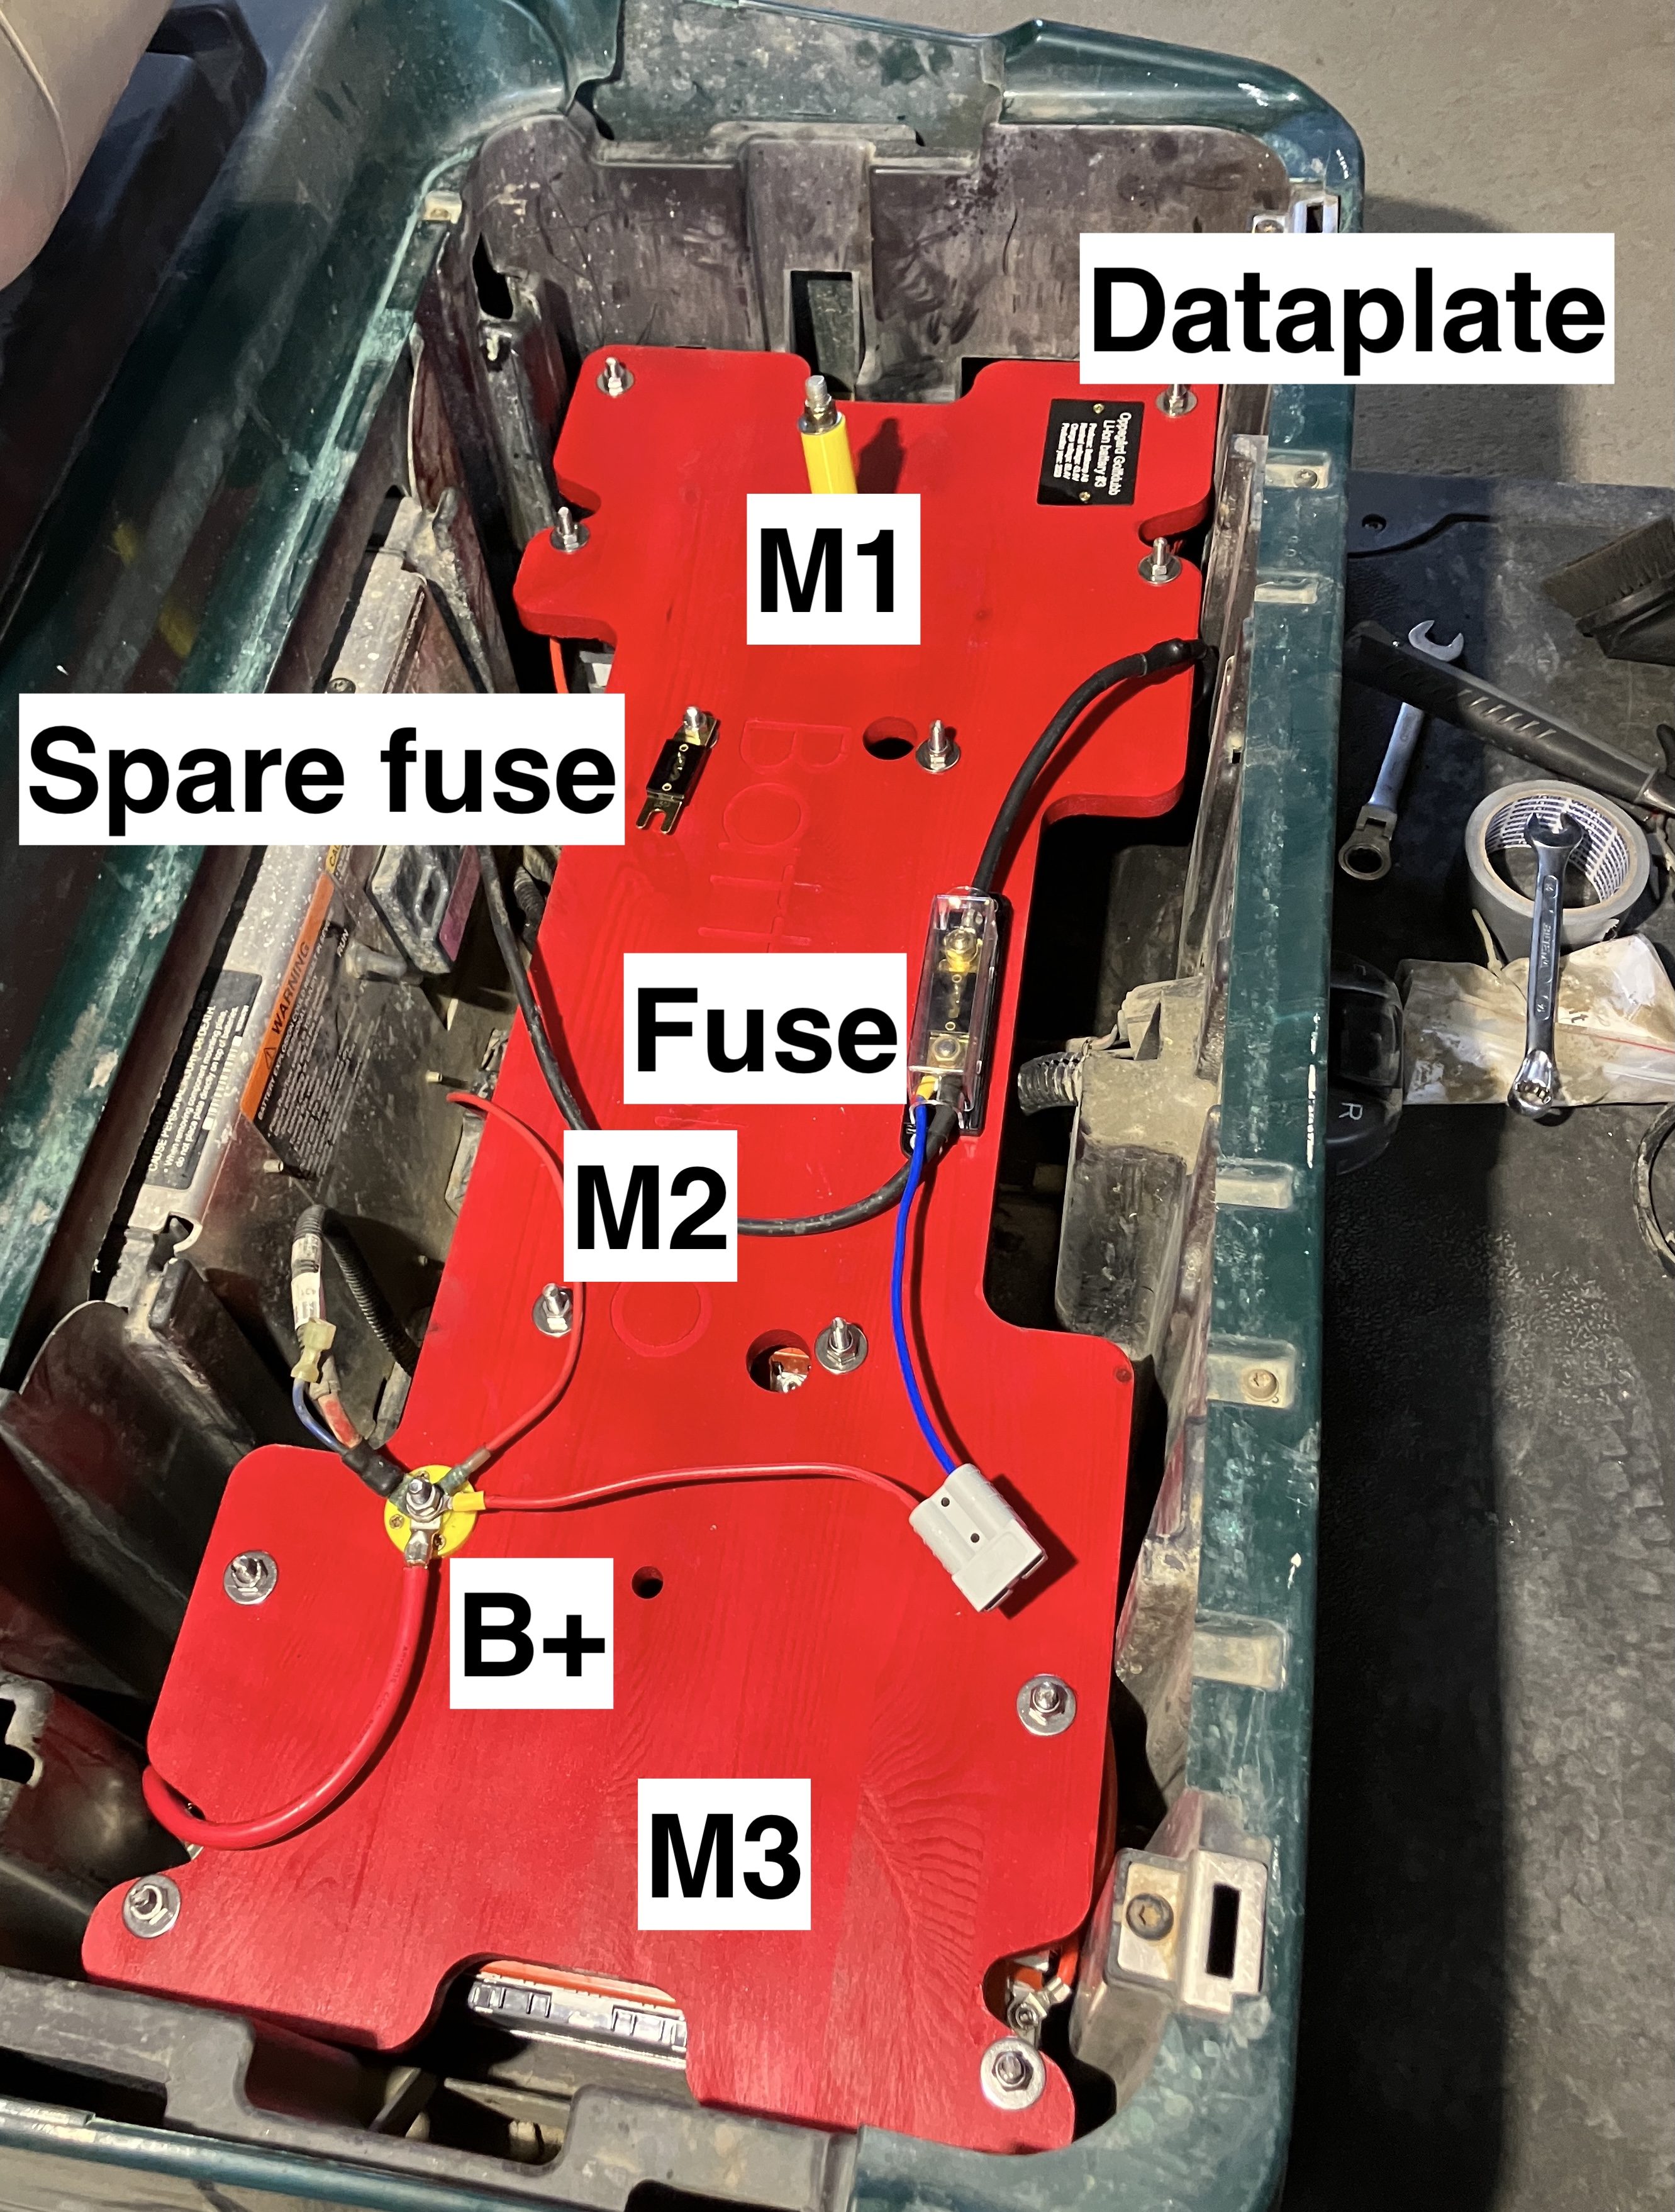
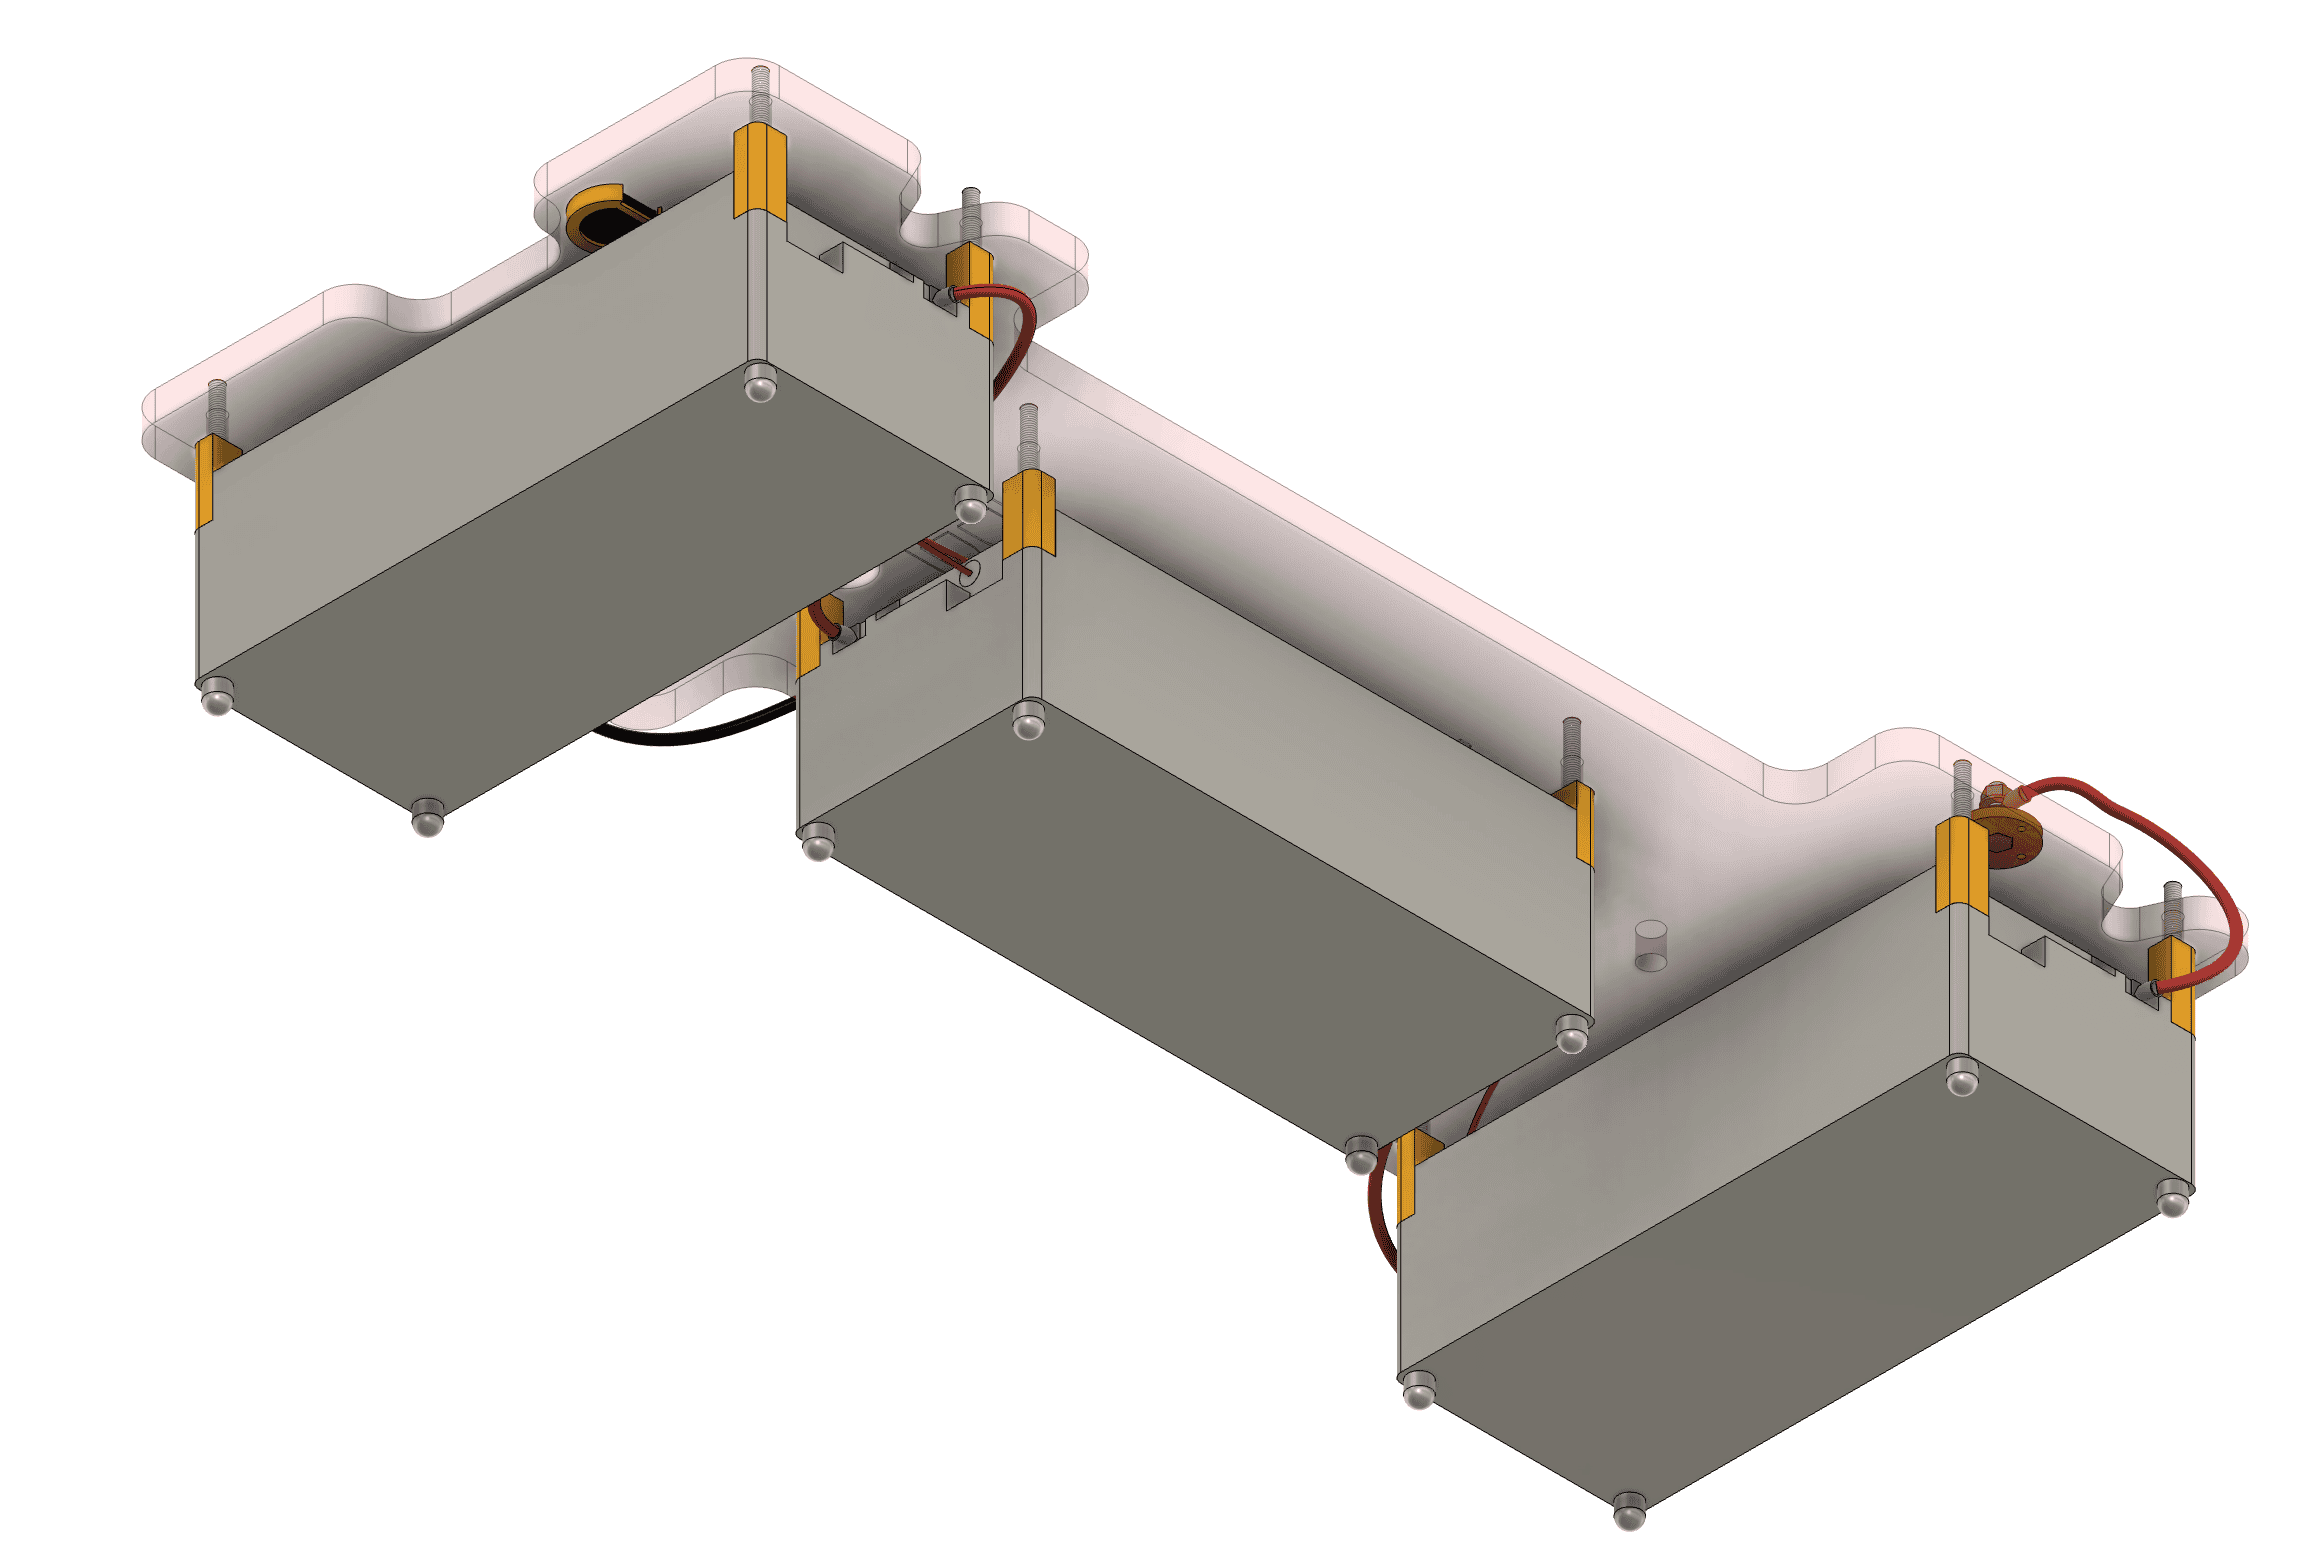
M1, M2, and M3 are the three battery modules attached to the bottom of the big red wooden plate. The modules are not clearly visible when the battery is mounted in the golf cart, but they look like this:
There are holes and cutouts where you can easily put in a multimeter probe to measure the voltage of each module. Do that! You should measure three near-identical voltages.
Each module contains 4 battery cells in series, therefore the module voltage should be between 12.0 to 16.8V.
Make sure that each of the bolts securing the cables are tight.
You can measure from the most negative point, the negative end of M1, to the most positive point, the positive end of M3, and you should see the sum of the three module voltages. This number therefore needs to be in the 36.0 to 50.4V range.
If things are good so far, but you are unable to charge or drive the golf cart, the problem is most likely related to the BMS. If the modules are not of near-equal voltage, you need to boost up the weak one. If they are all too low, you need to carefully boost them up together.