
Test procedure for early prototypes
After assembly, each board needs to be tested and approved before it may be used in a battery. The testing must be done immediately after assembly. It should take no more than a minute to test a board once the setup is in place.
Gain test
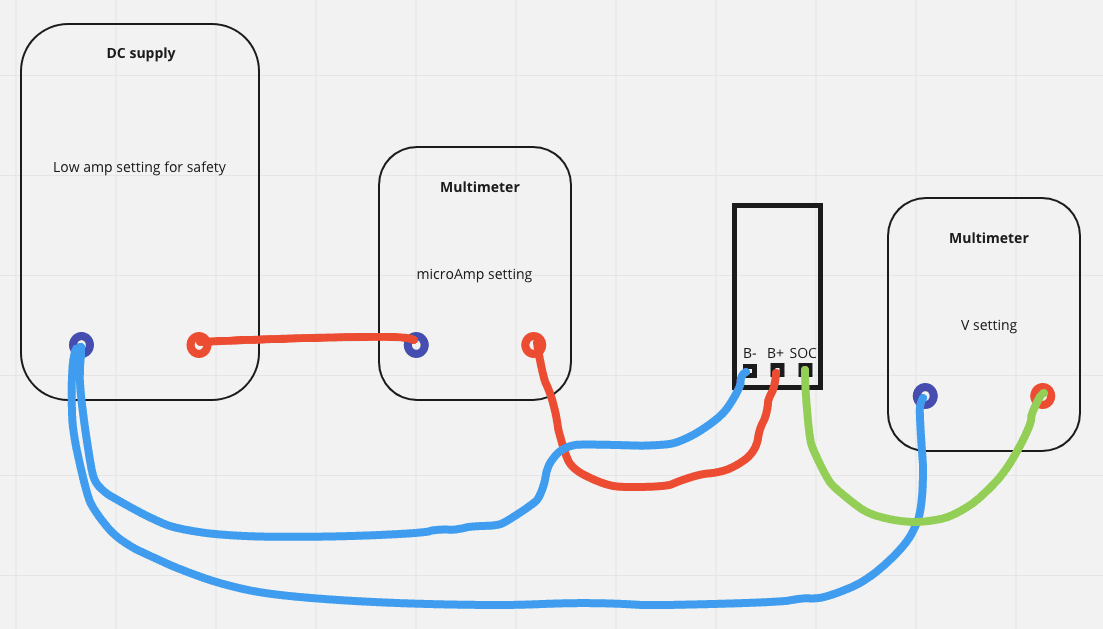
Set up the multimeters:
- One to measure microamps - up to 10 uA
- One to measure voltage - up to 10V
Set up the desktop DC supply BEFORE attaching the crocos to the board:
- 33.5V
- Turn off current
- Attach crocos
- Turn on little current
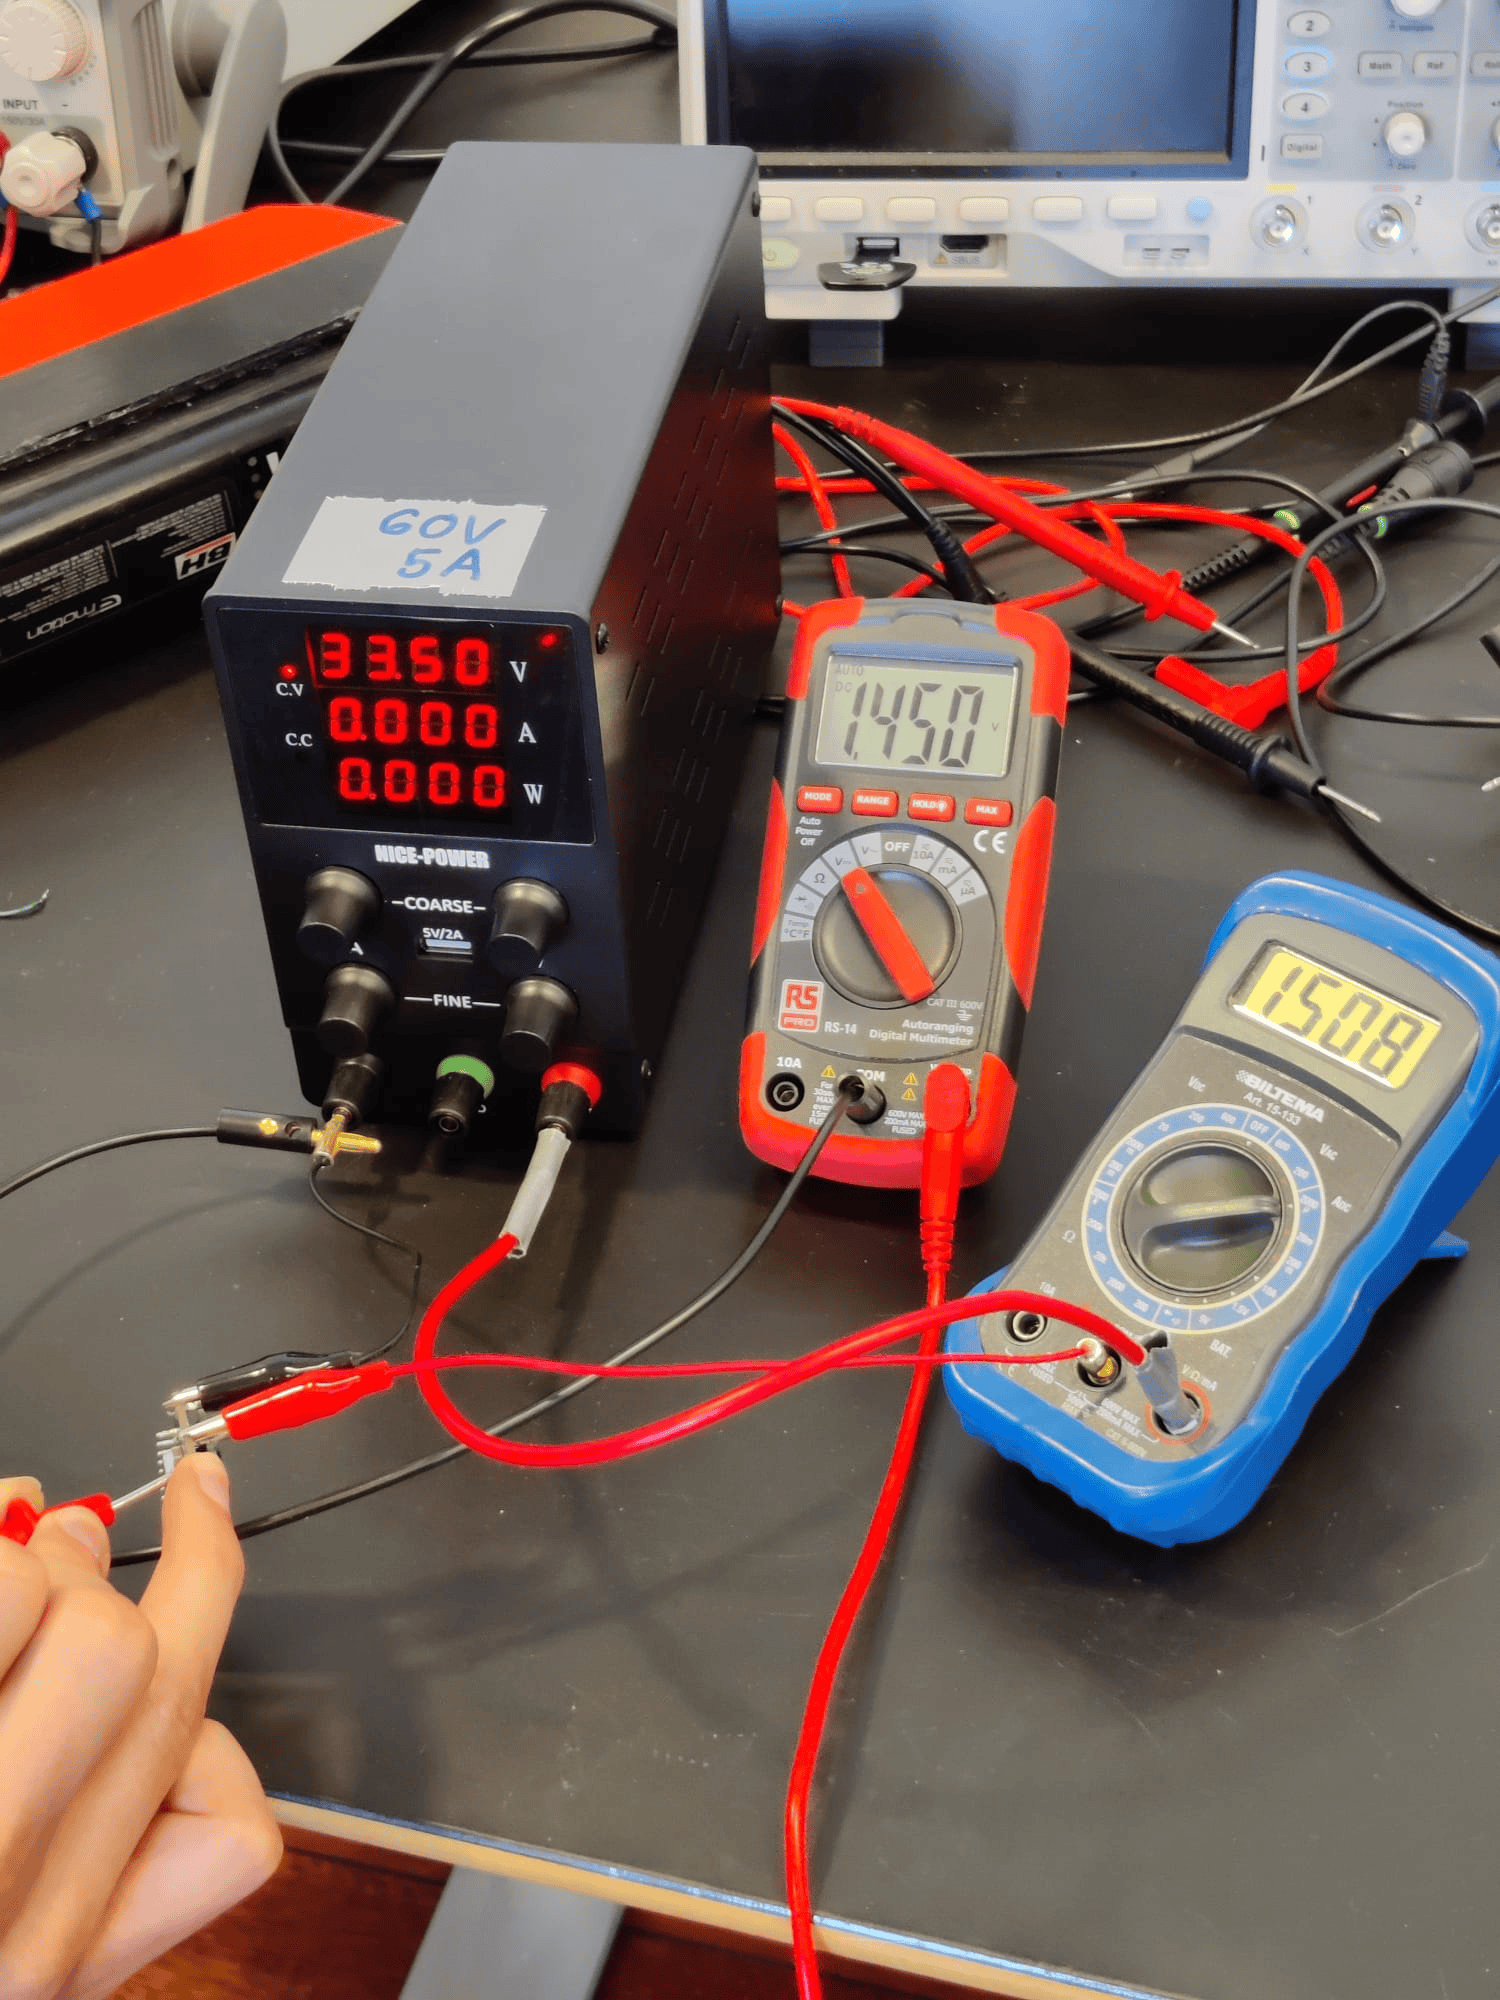
The LED should come on on the board, and you should see:
- 1.449 V +- 50mV
- 1508 uA +- 50 uA
Now:
- Turn up the voltage to 42.0V
- Turn off the current, wait for the voltage to disappear - 5 seconds
- Turn on a little current
The LED should come on on the board, and you should see:
- 10.06 V +- 0.05V
- 1231 uA +- 50 uA
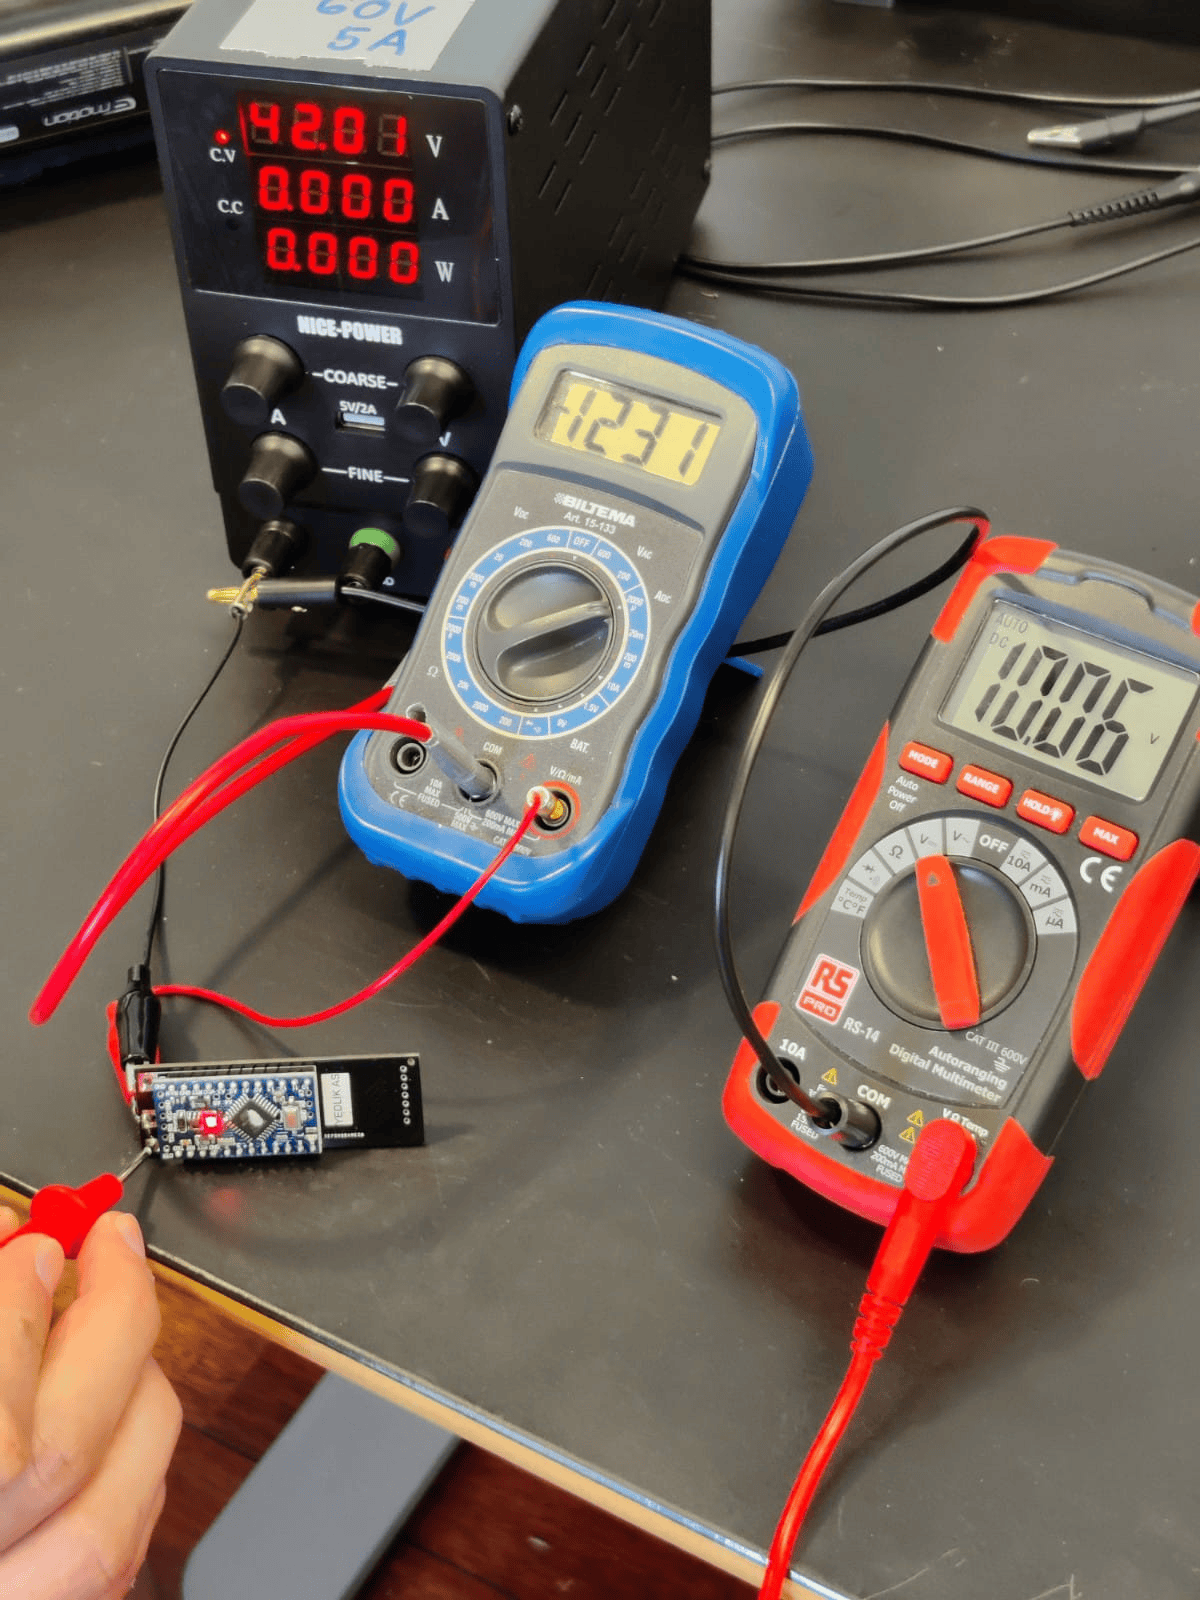
If the input voltage is above 41.37V, it saturates to 10.06V.
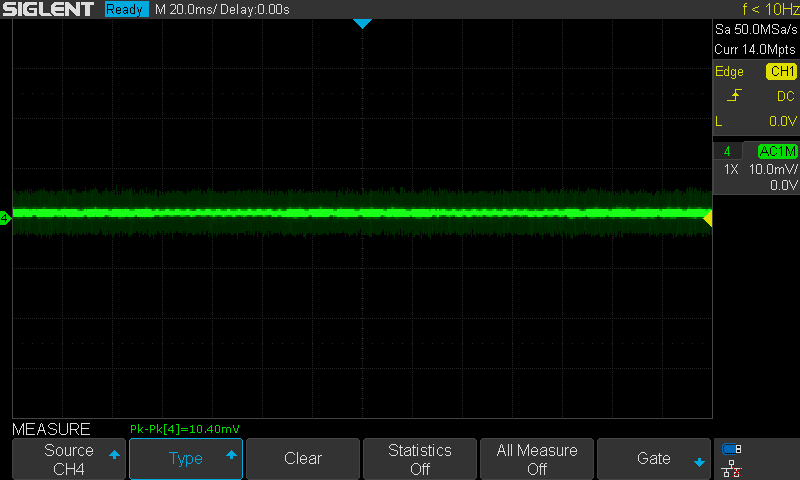
Noise test
A fully charged 36V battery need to be connected, and the scope to measure the output:
- 20ms
- 10mV
- Measure Pk-Pk
The measured noise should be below 20 mVpp, look like this:
No comments to display
No comments to display